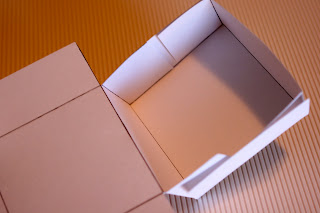
As my husband was eating pizza for lunch, I decided to "play" with my paper to re-create a pizza box.
Here's how it turned out...
I made the box and then made 10 little matching notecards to go inside.
I embellished using the bird punch... aren't they cute?!
So here's what I did...
Cut a sheet of cardstock down to 6 1/4" by 11". On the 6 1/4" side, score at 1 1/2" and 4 3/4" (you do not have to draw lines...I just did so you could see where I scored).
Next, rotate the paper to the 11" side. Score at 1 1/2", 4 3/4", 6 1/4", and 9 1/2"
(again, you do not need to draw lines).
Fold all scored lines. Then cut each "tab" as follows...
At this point, you can use a circle cutter to cut out a shape in the top and adhere a piece of acetate (transparency film) inside of the box to make a window... or you may choose to leave your box plain.
Glue each short "tab" inside of the adjacent long "tabs" (as shown).
I recommend using "Sticky Strip" as it will hold better.
Once you've glued all your pieces, embellish your box any way you'd like.
On my box, I punched out a bird and leaf using the SU! Bird Punch and made a little tag from 2 circle punches and the Designer Label punch.
The final box is 3 1/4" square and 1 1/2" tall.
I made 10 little notecards to match the outside of the box.
The box will hold 10-12 3"x3" notecards plus envelopes (which are 3 1/8" square).
Email me or shop my Stampin' Up! store to purchase any of the items I used to make this cute gift!


No comments:
Post a Comment